MMdetection安装
https://mmdetection.readthedocs.io/zh_CN/latest/
https://github.com/open-mmlab/mmdetection
1、创建虚拟环境

2、激活虚拟环境
1 | conda activate open-mmlab |

3、安装cython

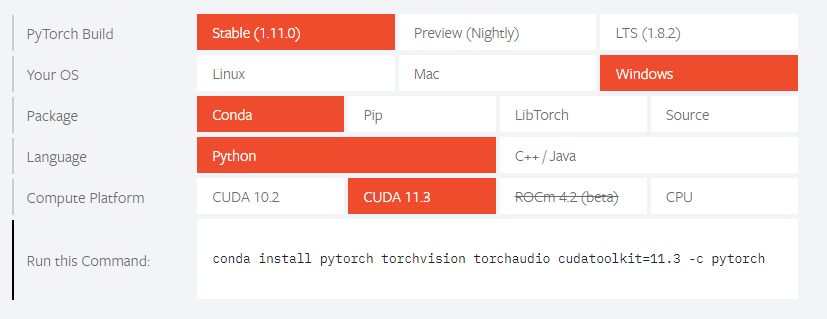
4、基于Pytorch官网安装 PyTorch 和 torchvision
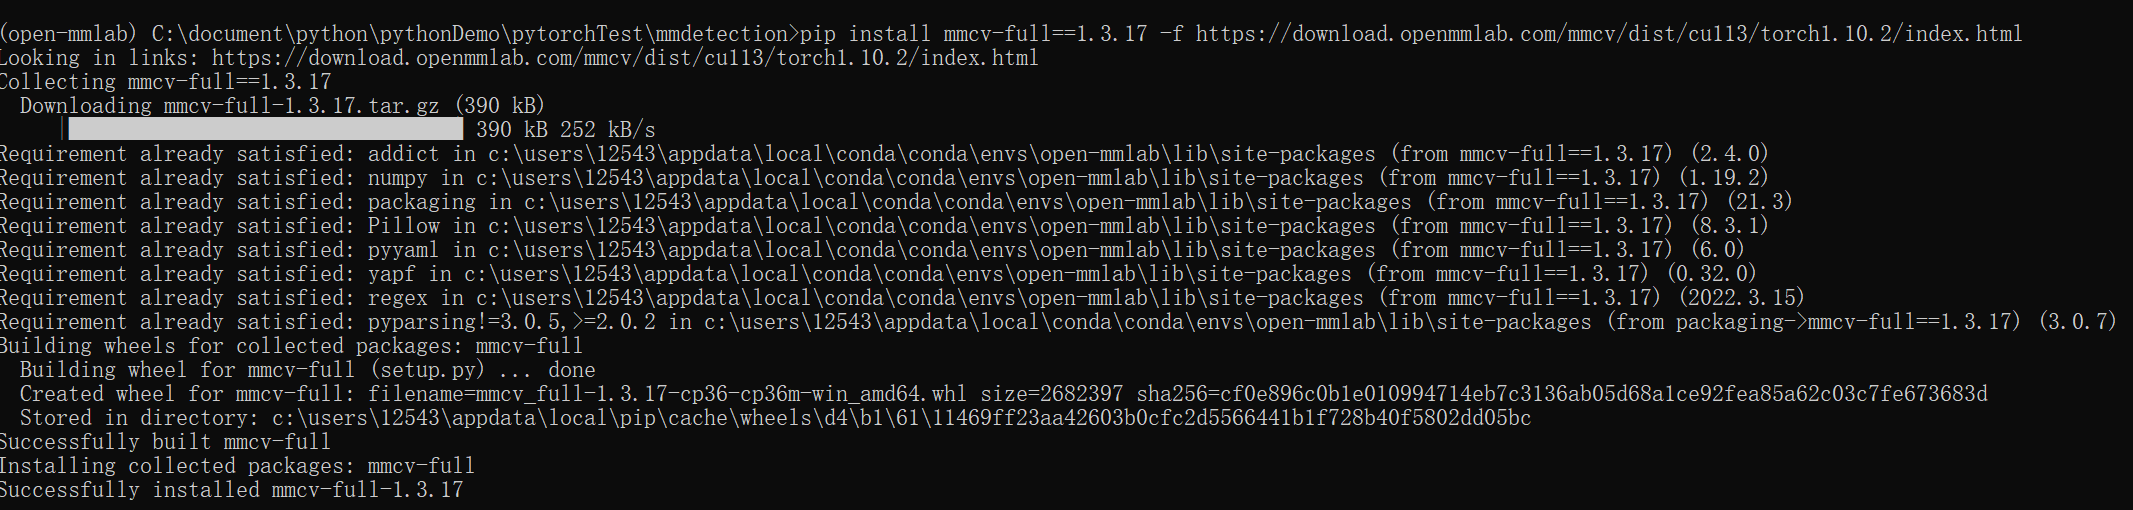
5、根据cuda与torch版本安装mmcv
6、安装mmdet

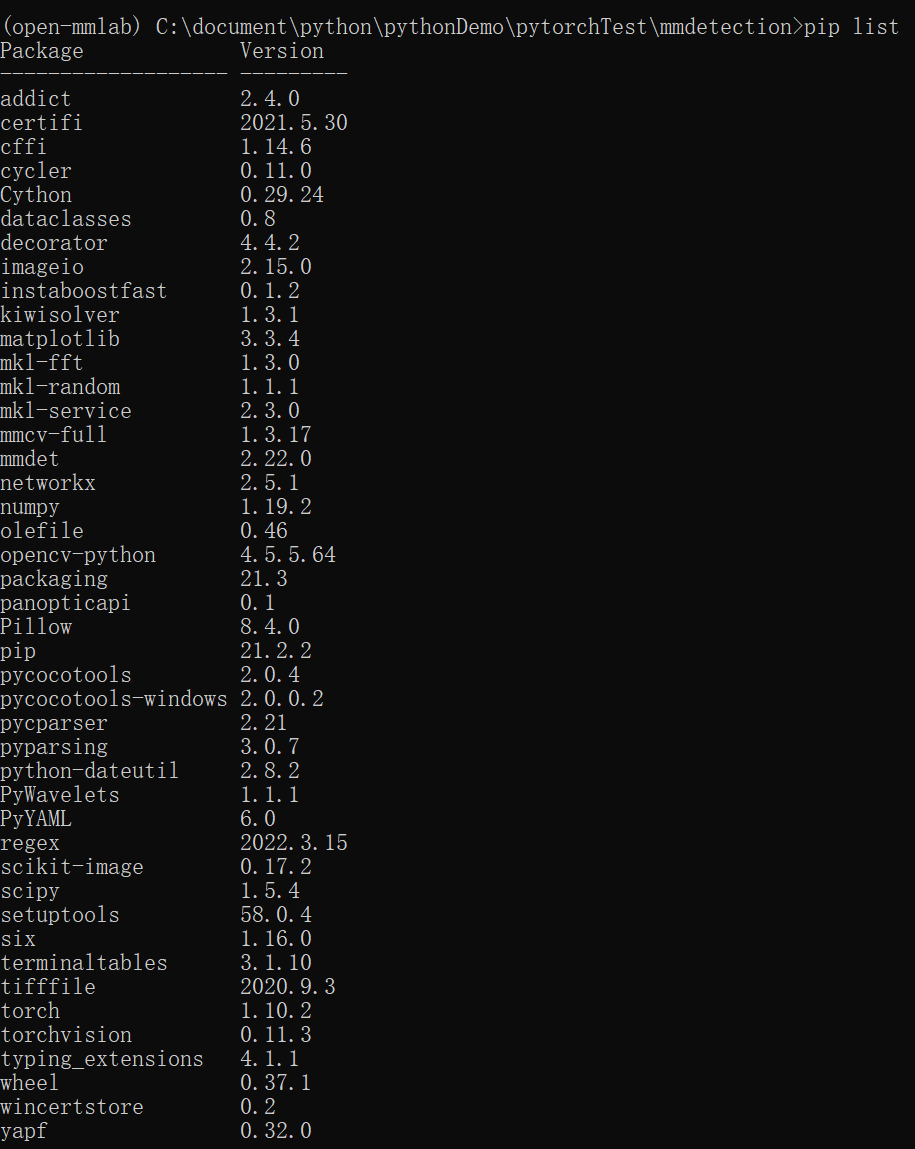
7、各包版本
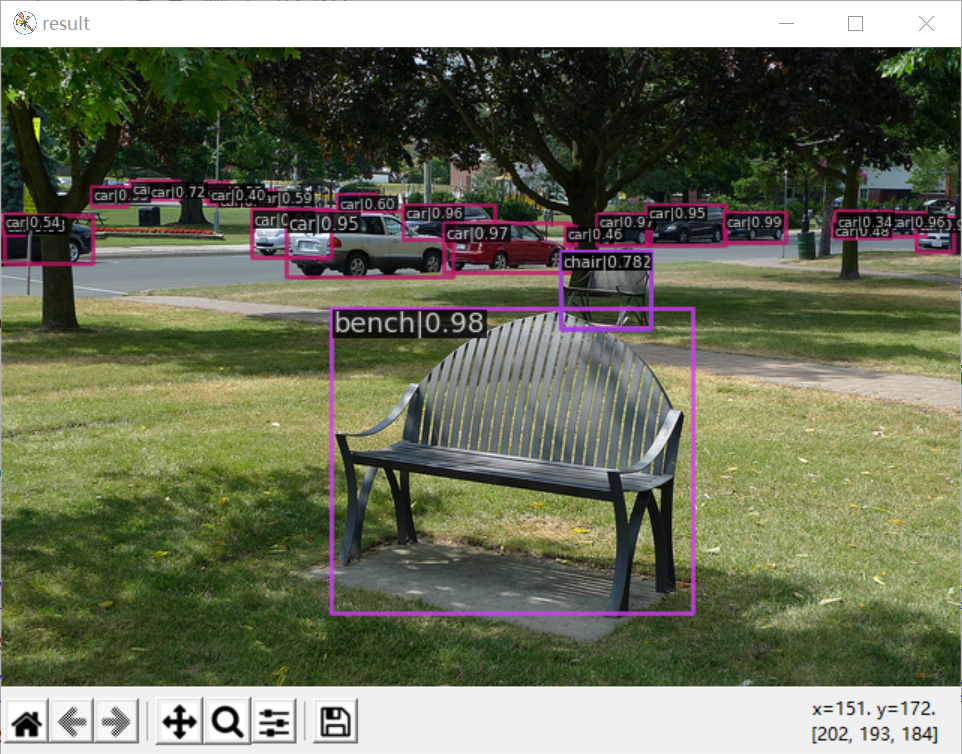
8、测试
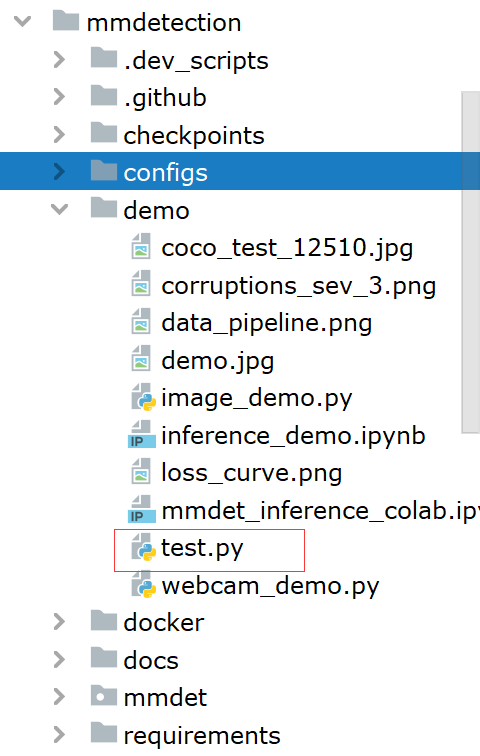
在demo文件夹下新建test.py文件
1 | from mmdet.apis import init_detector, inference_detector |
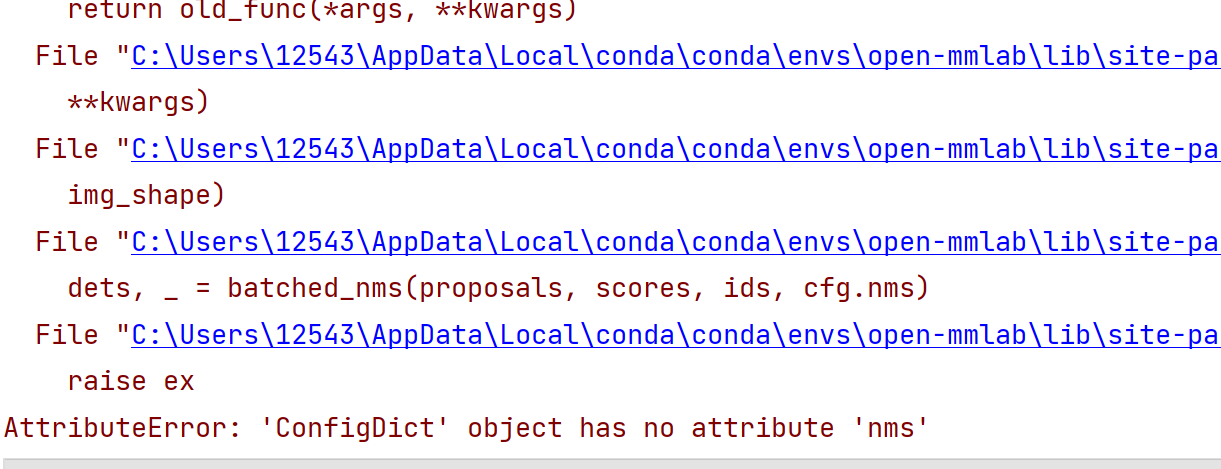
出现报错
打开configs/base/models
打开faster_rcnn_r50_fpn.py
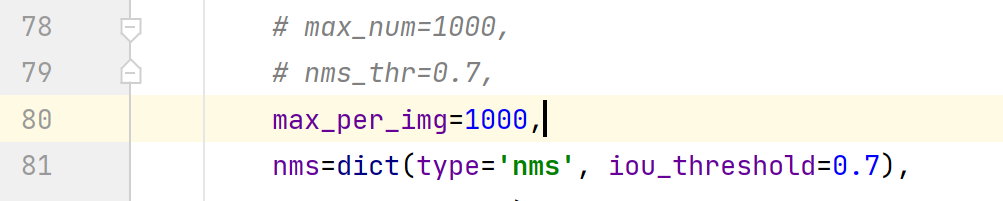

如上修改后运行成功
本博客所有文章除特别声明外,均采用 CC BY-NC-SA 4.0 许可协议。转载请注明来自 折花入酒blog!